


Scanner art, is not always as easy as it may first appear.
Just scanning something does not necessarily make it art.
Professional artists often take hours, if not days, weeks and in some cases months to create their masterpiece!
Their has been many disputes about this type of art form when asking; "How can anyone call this art?"

The same thing was once said about taking pictures with a camera!
A camera takes pictures, some images may be considered art others are not. The photo scanner is just another process to captures images. This question comes up regarding any new art form or technique.
The Stages of Scanography as Art
•Find interesting and creative subjects
•Placement on the photo scanner bed
•Mistakes and Retakes
•Digital software
The Search for Creative Subjects
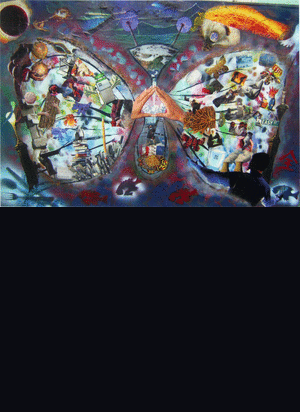
People who use scanners to create art are imaginative people.
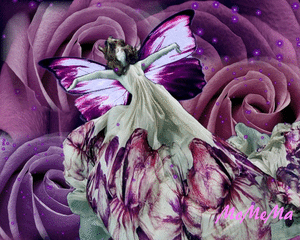
If you're fortunate enough to have exotic flowers in your yard, use them. The items I used in this picture are found objects around my house and also you may scan youself. Sometimes even weed flowers work wonderfully!
Other places to find fresh flowers are open air markets and even the grocery store.
Otherwise, the local florist may become your new best friend.
Odd objects, insects, textures, fabrics, combination of objects, ect...
Fruit and vegetables also fascinate me as photo scanner art subjects.
Placement Of Objects
Here comes the artistic part. After selecting a great subject or two, the creative process continues with: placement.
When planning a composition, place everything as if you are in the scanner looking up. This is vital.
Mistakes and Retakes
Just keep scanning. After your first scan, rearrange the same items and scan again. The repositioning of a subject may change everything! Don't get frustrated it's take a lot of time to create a Masterpiece that you like! Have FUN...
Time To Clean-Up
This is where you clean things up, crop, resize and sometimes add your own flavor. Many artists use Photoshop to add a personal unique touch to their scanography.
Plan your work in the digital darkroom when you have time to spend - hopefully without interruptions. Stay organized!
Your Masterpieces
Now that you have your very own special pieces of scanner art ... frame a couple, use them on your website.
SCANOGRAPHY ART TUTORIAL II
Things to know first:
Equipment Needed -- A computer, flat bed photo scanner, and a lint-free cloth. That's it. And, you don't need much computer expertise to grasp the basics.
Use your Photo Scanner, with existing software, to create Scanner Magic! This no-camera photography is easy to learn. You will create close-up (macro) photography easier than ever.
Turn your flatbed scanner on. (If it's new, make sure you have installed the software and read basic instructions.) It may take a little while to warm up, this is normal. Warmer is better. Clean the scanner bed before and after every scan. Dust, pollen and even tiny hairs show up in close-up (macro) photography -- and that's what you're creating.
Leave the top up. Carefully place your subject face down, on the glass of the photo scanner. Use anything that fits within the parameters of the flatbed's dimensions. Try to keep smudges off the glass. Yes, they will show up.
•Consider this learning stage as practice don’t spend a lot of time being creative
•Try a leaf, a flower, even your dog's toy will work
•Avoid anything with sharp edges that may scratch the glass
•Remember, place items to scan face down
•The “camera” is looking up
•Leave the scanner top up
Go to your photo scanner software location. (I keep mine on my desktop so I can find it easily. My icon reads Lexmark Imaging Studio). Read the brief but specific instructions to Scan and Save.
Quite often just using a scanner with the top up gives you the black background you're looking for, because of the limited Depth of Field. However, ambient light can interfere. For best results turn off any lights in the room. If necessary, move the computer monitor so it doesn't face the scanner.
Hit Scan. Then scan the same item several more times in different positions. Preview views let you see what your scans look like. Keep scanning, you can always delete them. At this point you have NOT saved your images, however . . .Congratulations, you have created your first Scanner Art!
Before you Save, name your photo scanner images. This is important. Eventually you will have a huge file. If images are only numbered, you will have no idea where anything is. Voice of experience speaking here!
Develop a simple system. For example, if you are taking pictures of three different colored leaves, use something like: 1. leaf yelw1 2. leaf yelw2 3. leaf grn1. Use whatever names will jog your memory.
Save all your photo scanner images in a new folder, separate from your 'real camera' photos. This will simplify finding them even better.
Once scanned, saved and placed in a folder, open your new pictures. Think you're ready to print a copy? Slow down.
Review your Scanner Photography carefully. Do any of your images look distorted or strange? I call these Oops, technically they are called posterization. Can you see dust, pollen or other uglies?
Final step: To resolve problems, clean up pictures and get them ready to print, click here to read the important details on your Photo Editor for Uglies and Oops.
Fun crafts with paper often call for photos;Gift wrap - Create your own gift wrap for those special little packages!
Wallpaper - Something really exotic for your computer!
Greeting Cards - You can make cards to compete with those sold in museum shops!
Flyers -for clubs or business.
Making Calendars - Everyone needs a calendar.
Free Blank Calendars- is the place to find the perfect never out-of-date calendar grid in several different different formats.
Postcards- Design our own postcards using card stock paper and sell them by the dozen to Gift shops, Art Galleries, ect.
Marketing Idea - Instead of traditional business cards distribute 3" X 5.5" handouts printed on card stock. Use one side for your favorite scan art photo and the other for your message. Research proves people are much more likely to value and keep a larger, more colorful piece of advertising.
Use them as you would business cards- Everyone loves a pretty picture. If you need large quantities, have your cards done quickly and inexpensively at a site called Moo.
Bookmarks - Create your own bookmarks.
Scan a favorite item- Punch a small hole in the top end. Add a decorative string or ribbon.
You now have bookmark to share with your reader friends.
Publish a Book- Go to www.blurb.com and download the software and design your very own Scanography Art book! Publish it, Sell it...
START CREATING AND BE INSPIRED!!!
If you have any questions please e-mail me, I'll be happy to assist you!
INSPIRE OTHERS TO BE CREATIVE!!!
Big Hugs


Lindo blog! estou seguindo.
ReplyDeleteBjs